Potential Painting Problems
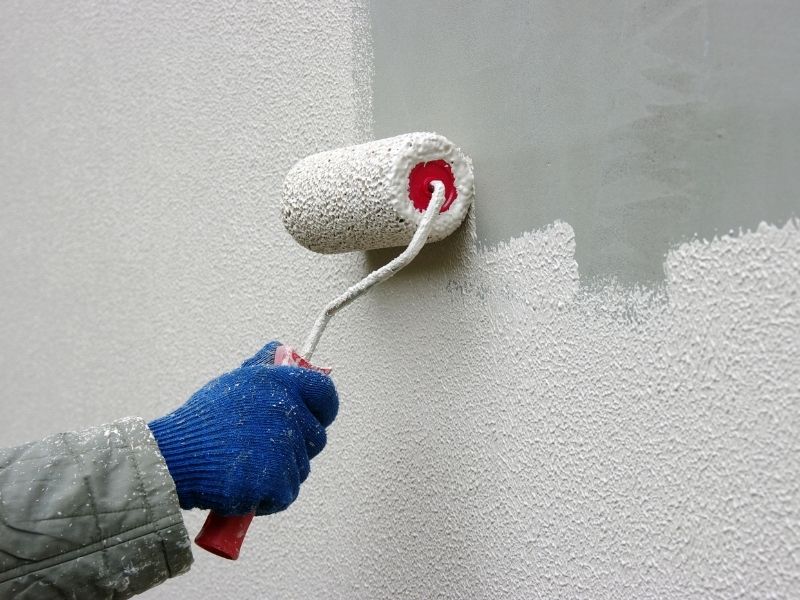
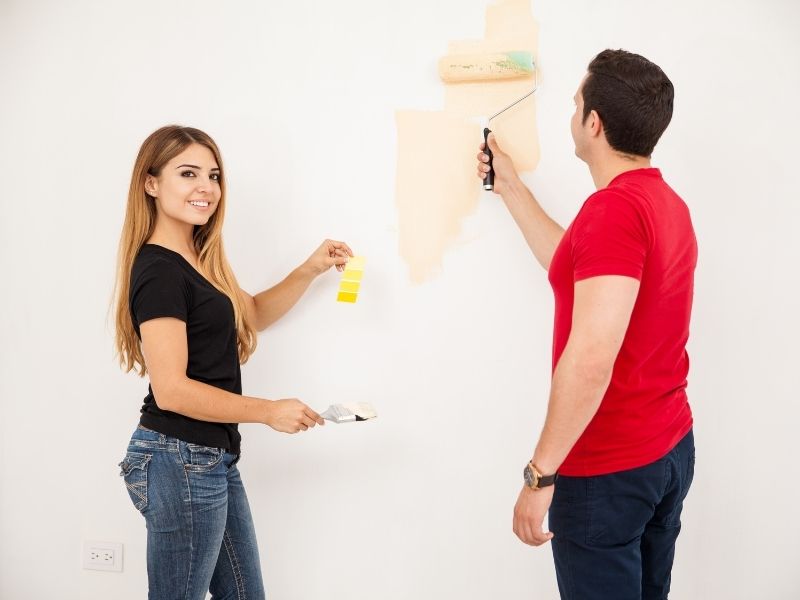
Thinking of painting your house?
Have you watched all those home renovation and do-it-yourself shows for years, and thought, ‘how hard could it be’?
Sounds easy in principle.
Get some tins of paint, a couple of brushes, rollers, a few drop-sheets and hey presto, you’re set to go!
Don’t be fooled though.
Like most things in life, what seems simple and easy on the surface often hides several unforeseen pitfalls.
There are plenty of potential problems in store for the home painter.
Painting problems that could cost you lots of money, time, and frustration.
Problems you could avoid.
We’re here to help!
Here’s a list of 13 of the most common painting problems and how to fix them.
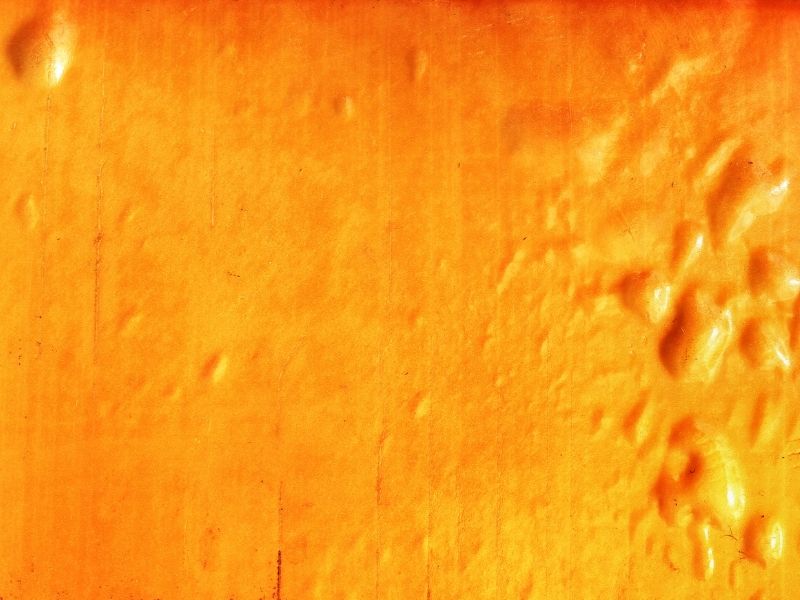
Painting Problem One: Blistering
Blistering occurs when bubbles form under the surface of your wall paint.
Paint blistering can be caused by:
- Applying oil-based or alkyd paint over a damp or wet surface.
- Moisture seeping through the exterior walls or interior walls such as bathrooms.
- Painting during high humidity, or exposure of acrylic paint to high humidity or moisture soon after the paint has dried.
- Inadequate surface preparation.
Solutions to Paint Blistering:
- Avoid painting during high humidity or if a high dew point is present.
- Allow adequate drying time before reapplying paint.
- If the paint blisters don’t go down to the substrate, then remove blisters by scraping, and sanding, and repaint with a quality acrylic interior paint.
- If blisters go down to the substrate then remove the source of moisture, if possible. Repair any loose sealant and consider installing vents or exhaust fans. Remove blisters by scraping and sanding, and remember to prime before applying the topcoat.
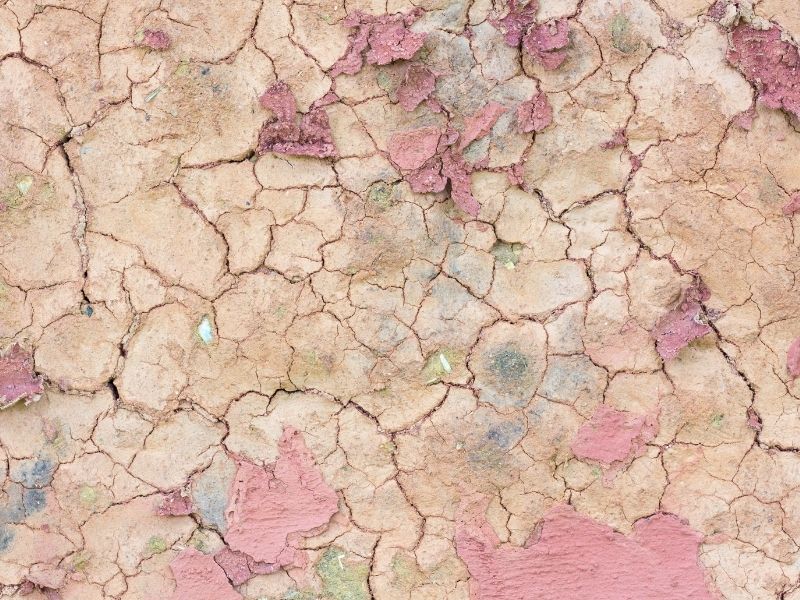
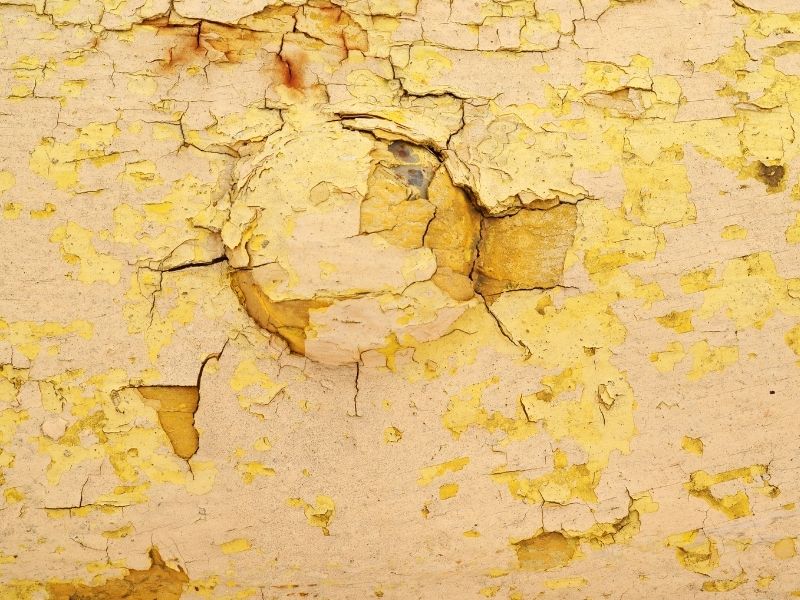
Painting Problem Two: Cracking/Flaking
Cracking or flaking paint happens with the splitting of a film of dry paint.
Paint cracking may be caused by:
- Aging of paint.
- Moisture under the film of paint.
- Use of inferior quality paint coatings which when dry is inflexible.
- Overthinning or overspreading the paint.
- Inadequate surface preparation, or applying the paint to bare wood without first applying a primer.
- If paint is applied to a moist or excessively hot surface, or where an inferior coating has been unevenly applied, flaking may be the result.
- Improper mixing of paint or uneven application of the coating are other known factors that cause cracking. The result of this is a breakup and peeling of the coating.
Solutions to Paint Cracking or Flaking:
- Complete removal of the existing coatings, all loose and flaking paint with a scraper or wire brush, sanding the surface and feathering the edges.
- Do not repaint until the surface is completely dry.
- Use a good quality paint and ensure it is thoroughly stirred before proceeding.
- If flaking occurs in multiple layers of paint the use of a filler may be necessary.
- Prime bare wood areas before repainting.
- Use of a top-quality primer and topcoat should prevent a recurrence of the problem.
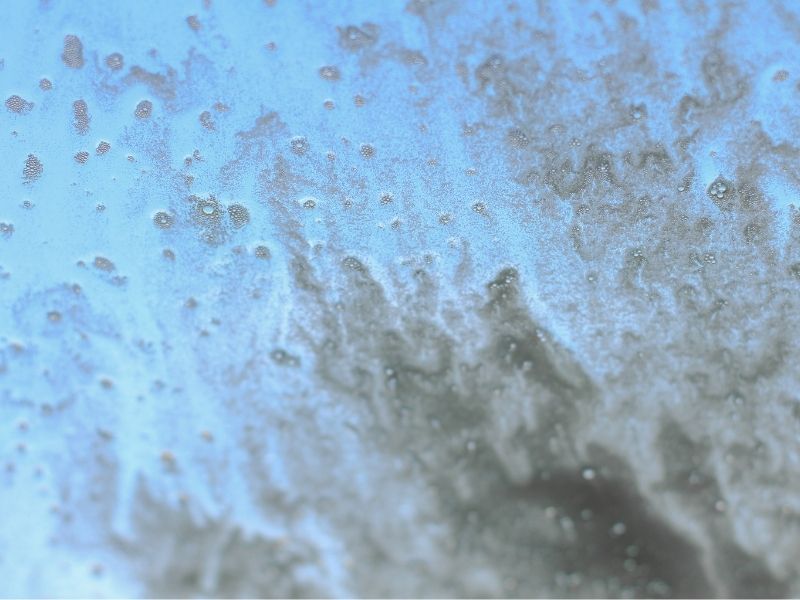
Painting Problem Three: Foaming/Cratering
The formation of bubbles in the paint, known as foaming, and small, round concave depressions (cratering) occurs when bubbles break during paint application and drying.
Paint foaming and cratering can be caused by:
- Shaking a partially filled can of paint.
- Use of low-quality paint or very old acrylic paints.
- Applying (especially rolling) paint too rapidly.
- Use of a roller cover with wrong nap length.
- Excessive rolling or brushing of the paint.
- Applying a gloss or semigloss paint over a porous surface.
Solutions to Paint Foaming and Cratering:
- While paints will foam to some degree during application, higher quality paints are formulated so the bubbles break while the paint is still wet, allowing for good flow and appearance.
- Avoid excessive rolling or brushing of the paint or using paint that is more than a year old.
- Apply gloss and semigloss paints with a short nap roller and apply an appropriate sealer or primer before using such paint over a porous surface.
- Problem areas should be sanded before repainting.
Painting Problem Four: Framing
Framing happens when a wall is painted with a roller but is brushed at the edges and corners. The brushed areas appear darker, resembling the frame of a picture.
Framing may also occur when sprayed areas look darker than neighbouring sections that are brushed or rolled.
Paint framing may be caused by:
- Framing with paint may occur because brushes result in a lower spreadrate than rollers, which produces a thicker layer of paint.
- Failure to maintain a “wet edge” when painting.
- Use of a low solids “economy” paint.
Solutions to Framing:
- Ensure adequate coverage is achieved across the entire wall.
- Maintain a wet edge when painting by applying paint toward the unpainted area and then back into the just painted surface.
- Work in smaller sections of the room to maintain a ‘wet edge’ and ensure spread rates between brushes and rollers are similar.
- With tinted paints, be sure to use the correct colourant-base combinations.
- Factory colours, as well as in-store tints, should be thoroughly shaken at time of sale, and the paint should be stirred well prior to use.
Painting Problem Five: Mildew
Mildew happens when black, grey or brown spots or areas appear on the surface of paint or sealant.
Paint mildew may be caused by:
- Painting on areas that are damp or receive little or no direct sunlight (such as bathrooms, kitchens and laundry rooms).
- Use of an enamel/oil based or oil-based paint, or lower quality acrylic paint.
- Failure to prime bare wood surface before applying the paint.
- Painting over a substrate or coating on which mildew has not been removed.
Solutions to Mildew:
- Apply a few drops of household bleach to the area to test for mildew.
- If it is bleached away, the discoloured area is most likely mildew.
- Remove all mildew from the surface by scrubbing with a diluted household bleach solution (one part bleach, three parts water), while wearing rubber gloves and eye protection. Rinse thoroughly.
- To protect against mildew, use a top-quality acrylic paint, and clean when necessary with bleach/detergent solution.
- Consider installing an exhaust fan in high moisture areas.
Painting Problem Six: Mud Cracking
Mud cracking is characterised by deep, irregular cracks that resemble dried mud in dry paint film.
Mud cracking may be caused by:
- Paint applied too thickly over a porous surface, or to improve inherent poor hiding (coverage) of a lower quality paint.
- Where paint is allowed to build up in corners upon application.
Solutions to Mud Cracking:
- Remove the cracked paintwork by scraping and sanding.
- Prime and repaint, using a top-quality acrylic paint.
- This type of paint is likely to prevent recurrence of mud cracking because it is relatively more flexible than alkyd paint, oil-based paint and ordinary acrylic paint. Premium quality paints have a higher solids content, which reduces the tendency to mud crack. They also have very good application and hiding properties, which minimise the tendency to apply the paint too thick a coat of paint.
Painting Problem Seven: Poor Hiding
Poor hiding is the failure of dried paint to obscure or “hide” the surface to which it is applied.
Poor hiding may be caused by:
- Use of low-quality paint.
- Use of low-quality tools or the wrong roller cover.
- Use of an improper combination of tinting base and tinting colour.
- Poor flow and leveling.
- Use of a paint that is much lighter in colour than the substrate, or that primarily contains low-hiding organic pigments.
- Application of paint at a higher spread rate than recommended.
Solutions to Poor Hiding:
- If the substrate is significantly darker or is a patterned wallpaper, it should be primed before applying a topcoat.
- Always use premium quality paint for better hiding and flow.
- Using quality tools is also important as well as the recommended roller nap, if using a roller.
- Follow manufacturer’s recommendation on spread rate.
- If using tinted paint, use the correct tinting base.
- Where a low-hiding organic colour must be used, apply a primer first.
Painting Problem Eight: Poor Scrub Resistance
Poor scrub resistance refers to the wearing away or removal of the paint film when scrubbed with a brush, sponge, or cloth.
Poor scrub resistance may be caused by:
- Choosing the wrong sheen for the area.
- Use of lower quality paint.
- Use of an overly aggressive scrub medium.
- Inadequate dry time allowed after application of the paint before washing it.
Solutions to Poor Scrub Resistance:
- Areas that require frequent cleaning should be painted with a highly washable premium quality paint that is specially formulated to provide scrub resistance.
- High traffic areas may require a low sheen, semi-gloss or gloss paint rather than a flat paint because the additional gloss is less porous and provides improved scrub resistance.
- Allow adequate dry time, as scrub resistance will not fully develop until the paint is thoroughly cured. Typically, this will be one week.
- Try washing the painted surface with the least abrasive material and mildest detergent first.
Painting Problem Nine: Poor Sheen Uniformity
Poor sheen uniformity is when shiny spots or dull spots (also known as “flashing”) on a painted surface, uneven gloss.
Poor sheen uniformity may be caused by:
- Uneven spread rate.
- Failure to properly prime a porous surface, or surface with varying degrees of porosity.
- Poor application resulting in ‘lapping’.
Solutions to Poor sheen uniformity:
- New substrates should always be primed and sealed before applying the topcoat to ensure a uniformly porous surface.
- Make sure to apply paint from “wet to dry” to prevent lapping. Often, applying an additional coat will even out sheen irregularities.
- Without the use of a primer or sealer, it’s likely you’ll need an additional coat of paint to even out any sheen irregularities.
Painting Problem Ten: Poor Stain Resistance
Poor stain resistance is the failure of paint to resist the absorption of dirt and stains.
Poor stain resistance may be caused by:
- Use of lower quality paint that is porous in nature.
- Application of paint to un-primed substrate.
Solutions to Poor Stain Resistance:
- Higher quality acrylic paints contain more binder, which helps prevent stains from penetrating the painted surface, allowing for easy removal.
- Priming new surfaces reduces the porosity of the substrate; the correct film thickness in the topcoat will maximize stain resistance.
Painting Problem Eleven: Roller Marks / Stipple
Roller marks or stipple is the unintentional textured pattern that is left in the paint by the roller.
Roller marks or stipple may be caused by:
- The incorrect roller cover is used.
- Lower quality paints.
- Use of low-quality rollers.
- The incorrect rolling technique is applied.
Solutions to Roller marks or Stipple:
- Use the proper roller cover.
- Avoid too long a nap for the paint and the substrate.
- Use quality roller to ensure adequate film thickness and uniformity.
- High quality paints tend to roll on more evenly due to their higher solids content and leveling properties.
- Pre-dampen roller covers used with acrylic paint; shake out excess water.
- Don’t let paint build up at roller ends.
- Begin rolling at a corner near the ceiling and work down the wall in three-foot square sections.
- Spread the paint in a zigzag “M” or “W” pattern, beginning with an upward stroke to minimise spatter; then, without lifting the roller from the surface, fill in the zigzag pattern with even, parallel strokes.

Painting Problem Twelve: Sagging
Sagging is the downward “drooping” movement of the paint film immediately after application, resulting in an uneven coating.
Sagging may be caused by:
- Application of a heavy coat of paint.
- Painting in excessively humid and/or cool conditions.
- Application of over-thinned paint.
- Airless spraying with the gun too close to the surface being painted.
Solutions to Sagging:
- If the paint is still wet, immediately brush out or re-roll to redistribute the excess evenly.
- If your paint has already dried, sand and reapply a new coat of top-quality paint.
- Do not thin the paint; avoid cool or humid conditions; sand glossy surfaces.
- Always apply paint according to recommended spread rate and avoid overloading with thick paint layer.
- Two coats of paint at the recommended spread rate are better than one heavy coat, which can also lead to sagging. In this instance, gravity is not your friend, so consider removing doors to paint, while supported horizontally.
Painting Problem Thirteen: Yellowing
Yellowing is the development of a yellow cast in aging paint which is most noticeable in the dried films of white paints or clear varnishes.
Yellowing can be caused by:
- Oxidation of alkyd or oil-based paint or varnish
- Heat from household items like stoves and heaters, or a lack of light to the area.
- It is also caused by exposure to ammonia from adjacent acrylic paint application in the same room. Ammonia can oxidize the alkyd component in the oil-based enamel and cause premature yellowing.
Solutions to yellowing:
- Top quality acrylic paints do not tend to yellow, nor does non-yellowing varnish.
- Where possible, choose a top-quality water-based paint and/or a non-yellowing varnish.
Do Your Painting Right
We hope you found this list of common paint problems and their solutions helpful.
If you are going to do painting yourself, it’s important to do it right.
Always use high quality paints and tools.
Do not skimp on materials or correct techniques. It is just not worth the time or hassle.
On the other hand, if you decide not to risk all the potential problems and pitfalls of DIY painting, and you want to guarantee a top-quality premium painting finish for your home or office, please contact us today on 0404 227 330 for a free quote!
P.S. You can now get a free quote yourself in seconds with our new online quote estimator.
*Thanks to Haymes Paint and Dulux for most of the information used in this list